Clawdbot GitHub Repository Guide: Code Structure, Version Updates & Contribution Guide
Clawdbot GitHub Repository Guide: Code Structure, Version Updates & Contribution Guide

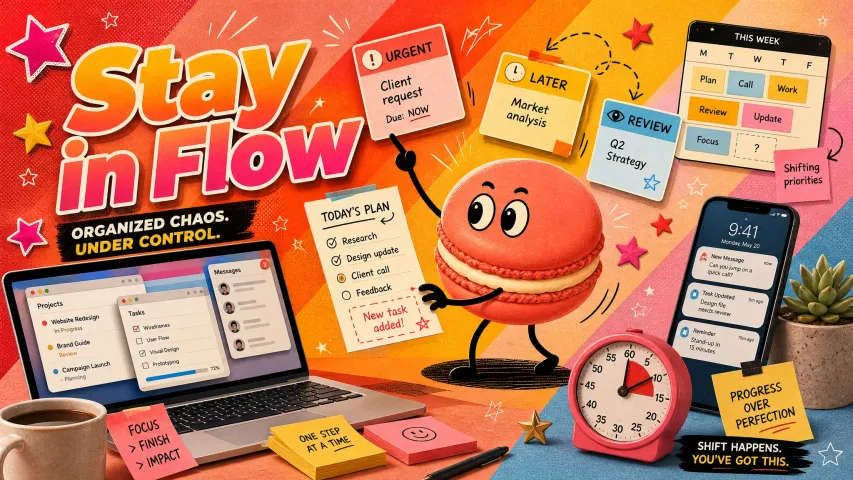
Hey guys, I'm Anna. I went down the "Clawdbot GitHub" rabbit hole that day. I wanted a small bot to nudge a few personal repos along, label stale issues, draft tidy release notes, maybe whisper reminders in pull requests. I figured I'd skim the README, try it once, and forget about it by Thursday. That didn't happen. I spent a quiet evening in January 2026 clicking around the repo, cloning it, and seeing how far I could get without turning it into a whole side project. Here's what actually helped, what got in the way, and the small ways it made my day-to-day a touch smoother.

Repository URL & Basic Info
If you're starting the same way I did, open tab, mild skepticism, go straight to GitHub's search and type "Clawdbot." It's the quickest route when you're not sure which fork is the source of truth. I used GitHub's global search and filtered by "Best match," then "Most stars" if there were multiple contenders. If you prefer fewer guesses, try a direct search like GitHub search for "Clawdbot".
What I look for first:
- A maintained README that mentions setup, environment variables, and at least one example command or workflow.
- Recent commits (ideally within the last 3–6 months). A quiet repo isn't automatically a red flag, but it changes expectations.
- A Releases tab with tagged versions, or at minimum a changelog. If Releases exist, it usually means someone's thinking about stability.
For context: I checked the repo in late January 2026. If you're reading this much later, a quick glance at the commit graph will tell you whether the project is active or in maintenance mode. I also peek at open issues and how the maintainers respond, short, specific replies are a promising sign.
A small thing that made me trust it more: example usage. Even a single "here's what the bot does with a simple config" example lowers the mental load. If I can copy/paste a minimal config and see a dry run, I'm in.
Quick Understanding of Code Structure

I don't want to memorize an entire codebase to decide if a bot is worth trying. I do a quick map: where are the commands, where's the config, and how does it talk to GitHub? Clawdbot was no exception.
Core directories
What I usually see in GitHub bot repos (and roughly what I found here):
- src or app: the heart of the bot, event handlers, command routing, and integrations. If there's an events folder, peek inside: it often mirrors GitHub webhooks (issues, pull_request, push, release).
- tests or e2e: worth scanning for real-world scenarios. I sometimes learn more from a test case than a paragraph in the README.
- scripts: developer helpers (setup, linting, local tunneling for webhooks). Not glamorous, but time-savers.
I open one file in each to get a sense of style and complexity. If handler files read like short utilities, I'm optimistic. If each function is a novel, I brace for friction.
Configuration files
The config story matters more than it sounds. It decides whether the bot feels like a companion or another dashboard you'll forget to open.
- Look for a top-level config file (YAML or JSON). I like it when defaults are sane and the file supports per-repo overrides.
- If there's a .env.example, that's a gift. It tells you exactly which environment variables you'll need, tokens, endpoints, optional flags. I copy it to .env and fill in the blanks.
- Bonus points for a config schema or validation step. Failing fast is kinder than failing silently.
One small friction I hit: a missing note about required scopes for the token (more on that below). Easy fix once I figured it out, but I had to dig.
Skills directory
If you see a skills or actions directory, that's a good sign. It usually means the bot is organized around discrete capabilities, labeling, triaging, auto-replying, summarizing, drafting release notes. The upside is you can toggle what you need and ignore the rest. I enabled just two "skills" to start: one for issue hygiene, one for release drafting. It kept things predictable and made logs easier to read.
A pleasant surprise: skills are often short, composable files. Even if you're not planning to code, skimming a couple gives you confidence about what the bot will and won't do.
How to View Release Updates
I've learned not to skip the Releases tab. It's where you find out if you're about to adopt something stable or something you'll be babysitting.
Head to the repo's Releases page (if they use it). If there's no Releases tab, look for CHANGELOG.md or release notes in the README.
Version number rules
Most projects use Semantic Versioning (SemVer): MAJOR.MINOR.PATCH.
- Patch (x.y.Z): bug fixes, safe to update.
- Minor (x.Y.z): new features, shouldn't break your setup.
- Major (X.y.z): potential breaking changes.
If the project says "follows SemVer," I trust MINOR and PATCH updates a bit more. If it doesn't say, I still skim the notes. I've been burned by "minor" updates that weren't.
Quick habit: I pin to a minor series (like 1.6.x) in my notes, then update patches freely. I only jump majors when I have half an hour and a cup of tea.
Breaking changes identification
The better repos label breaking changes clearly, either with a "BREAKING" prefix in release notes or a migration guide. If you see a migration section, read it before updating. You'll usually catch:
- Renamed config keys
- Permission or scope changes for tokens
- Event payload changes
If none of that is documented, I glance at diff stats between tags and scan open issues for "upgrade" or "break" mentions. It's not foolproof, but it saved me once when a config key moved from bot.yaml to bot.config.json without fanfare.
Running from Source (Developer-Focused)
I ran Clawdbot from source because I wanted to see logs in real time and understand what it would actually do to my repos before I let it roam.
What worked for me in January 2026:
- Clone and read the README top to bottom. It sounds obvious, but I catch small gotchas here, like a required Node version or a Python virtualenv. Many GitHub bots lean on Node.js with frameworks like Probot: others use Python with FastAPI/Flask. If the repo lists an engine or runtime, match it. Don't fight it.
- Copy .env.example to .env and fill in values. I started with a GitHub App setup (safer) when available: if not, a Personal Access Token (classic) with minimal scopes.
- Install dependencies. Node? npm ci or pnpm install. Python? pip install -r requirements.txt or uv/pdm/poetry, whatever the README says. If this step is slow, I go make tea.
- Run locally. Many repos support npm run dev or a python main.py. If webhooks are involved, they often recommend a tunneling tool like ngrok for local development.

- Dry run if possible. I love a DRY_RUN=true flag. If it doesn't exist, you can sometimes simulate with a "log-only" mode or point the bot at a throwaway repo you don't mind messing up.
Two small frictions I hit:
- Token scopes weren't spelled out. I had to trial-and-error to get issue labeling working. Once I added repo:status and issues permissions (for my case), it clicked.
- Event filtering wasn't obvious. The bot responded to more webhook events than I needed. Disabling a couple in config calmed the logs and my shoulders.
Why run from source at all? For me, it reduces mental load later. If I understand the moving pieces, webhooks in, permissions checked, action taken, I'm less likely to worry it'll do something surprising at 2 a.m. And yes, I do sleep better when logs are readable.
By the way, I'd like to add that we have also developed an AI tool product called Macaron that allows for actual experience. It can generate personalized and practical small tools (such as for daily life or daily tasks) based on your needs.

Security Considerations
I'm not paranoid, just cautious. A helpful bot with the wrong permissions is like giving your house keys to a very polite raccoon. Cute, until it isn't.
Token management
- Prefer a GitHub App over a Personal Access Token when the project supports it. Apps use granular, repository-scoped permissions and are easier to revoke.
- If you must use a PAT, use a fine-grained token limited to the specific repo. Avoid org-wide classic tokens unless you truly need them. GitHub's docs are clear on this: see About personal access tokens and Fine-grained PATs.
- Store secrets in environment variables or GitHub Actions secrets, not in config files. A .env file should never be committed. I like a .env.example that documents variables without values.
- Turn on secret scanning alerts if your plan includes it. It has saved me from myself more than once.
A small note from my test: rotating a token took two minutes and broke nothing. I set a reminder to rotate quarterly. It's boring and it works.
Permission configuration
- Principle of least privilege: enable only the events and scopes you need. If the bot manages labels, it doesn't need admin:org.
- Read vs write: for many "assistant" tasks, read access is enough to start. Grant write when you're confident.
- Scope drift check: after a few days, double-check what permissions the bot actually used. Some repos log this explicitly: otherwise, audit your config and remove anything you didn't touch.
- If you're deploying beyond local, consider a small staging repo that mirrors your main setup. It sounds formal, but it lets you test new versions without anxiety.
If you want to go deeper, GitHub's permission docs for Apps are solid: Permissions for GitHub Apps. It's not thrilling reading, but it's the rulebook the bot has to follow.

If you want a more step-by-step, less exploratory guide, you can continue here 👉 How to use Clawdbot


Apply to become Macaron's first friends
Read & discover
Free calculators
Company


